Inspiration Board for a Chocolate and Green Bedroom

Inspiration board for Mark

Note: Double click image to enlarge

I was at a graduation party this past weekend and ran into a good  high school friend of ours – Mark aka “Wooley”.  The recreational area where the party was held had a really nice red accent wall and Mark said he was thinking about using that shade in his master bedroom. He asked what my opinion was and since I shamefully had not been to see his new home (which he has had for a year!) I offered to stop by on Sunday and take a look.  I should add that I’ve heard Sunday’s in the summer at Mark’s include cocktails poolside, so it was not a hard sell!
Although I loved the red that he was considering, I felt that it blended too well with his furniture and suggested that he went with something that enhancedthe wood, rather than compete with it. His furniture consisted of a rich cherry sled style bed, large armoire and dresser. Additionally, he had splurged and purchased a really beautiful deep chocolate Hotel Collection bedding set that had a tailored black stripe as accent … nice job Mark 🙂
As I thumbed through a paint deck, my initial thought was to go with a blue/chocolate scheme, but Mark is a  bachelor and I was afraid the blue would go more feminine than masculine. I also should add that he is a bit obsessed with golf and once I saw the green, it  just seemed like a natural choice! I chose Sherwin Williams Rural Green and created the inspirational board pictured above. He also has the option of adding a little splash of orange down the line, which I think he would like as well.
The inspiration board is about clean lines, fresh accents and a peacefull elements for relaxing and romance – Mark should like that last one! What do you think?
Oh, and typically, I would list where everything is from, but that’s easy today…it’s all from Z-Gallery. Hmmm…do you think I like that store? And best of all there’s a 20% off accessories sale going on right now – gotta love that!

Step Three: Painting the Kitchen-a Kitchen on a Budget

Before Photo: Kitchen with Border
Before Photo: Kitchen with Border

Last weekend, the Kuster’s started painting their kitchen in Step three of their kitchen redo on a budget. Phase one was about finding the inspiration for their project and phase two consisted of selecting the finishes that they would apply. This past Saturday, Bill primed the walls. Ten years ago, Lori and I had stenciled some grape vines on the wall with oil based crayons, and as cute as it was back then, she’s so over that look. The before photo above shows the existing stencil at the top of the walls that extends throughout the kitchen.
Priming the Walls before Painting

Prime the Walls before Painting

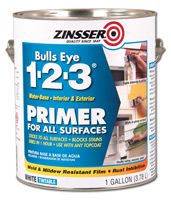
On Saturday, the first step was to apply a primer to ensure the oil based stencil can be easily painted over. Bill used the product below by Zinsser. It’s a water based primer that doesn’t require sanding, seals stains, sticks to all surfaces and is resistent to mold and mildew. Best of all, it dries in an hour. It may be an extra step you didn’t plan on, but it’s definately worth it in the long run. There’s some odor involved, so it’s best to open some window to ventilate.

Kitchen Walls with Primer

Kitchen Walls with Primer

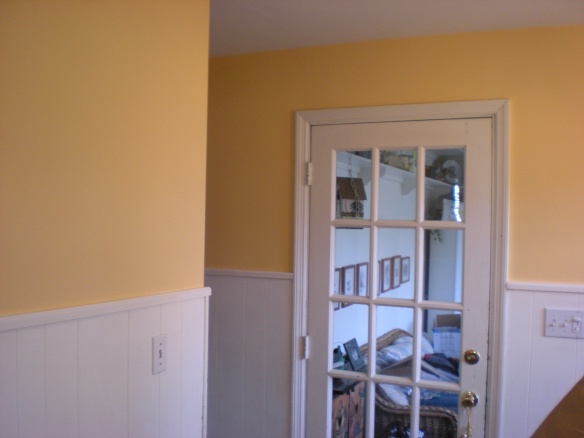
On Sunday, it was time to tape off the areas to be painted with Sherwin Williams Afterglow which goes on all the wall surfaces above the white bead board chair rail which still needs to be painted and the cabinets. Lori and Bill chose a satin finish so that it wouldn’t reflect the walls imperfections, yet could be easily cleaned as needed.

Sherwin Williams Afterglow

Sherwin Williams Afterglow

Here’s a before and after photo of another area of the kitchen…

side-door-in-kitchen

Before Photo of Side Door in Kitchen


Afterglow above Chair Rail

Afterglow above Chair Rail


Painted Wall with Roman Shade that was the Inspirational item for The Kitchen

Painted Wall with Roman Shade Laid Over the Door to see how it Matches

I’m thinking it’s going to be FABULOUS…what do you think? Great job Bill! Next step will be to paint the chair rail and cabinets. Stay tuned!