31 Days to Decorate Confidently. Day 25: Tips for Accessorizing

Not sure how to accessorize your room? Here are some tips…

A vignette is a group of items placed together to tell a story. A vignette defines a relationship among objects and creates interest. Rather than placing one item by itself, group it with several.

Pay attention to balance and scale and how they work together within a room. For example, a small picture hung by itself will look out of proportion on a large wall… a large sofa next to a tiny lamp will look out of balance.

Step outside your comfort zone and explore both symmetrical (equally balanced groups) and asymmetrical (non-balanced groups) arrangements.

Make it special by grouping similar objects, adding personal details or using items you adore.

Create some fun by adding something full of personality, a unique item or with an unexpected twist.

Assignment: Pick a room in your home and completely clear out the accessories. Keep what you love, search your home for anything else you could use in the room and re-accessorize it according to the tips above!

Enjoy! Amy xo

To start at the beginning of the series, click here!

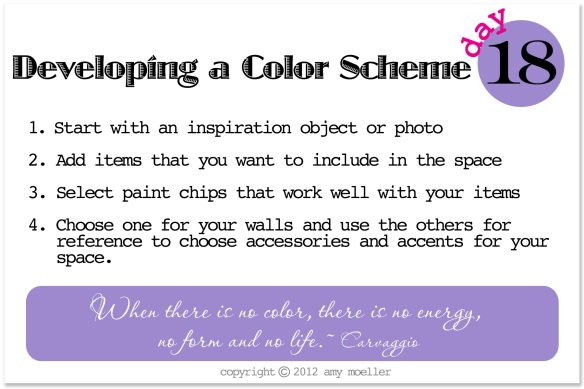
31 Days to Decorate Confidently. Day 18: Developing a Color Scheme

Now that you understand color, the next step is developing a color scheme…

Follow these steps and you’ll find that developing a color scheme is easy!

Pull out your inspiration object or photo and use as a starting point for selecting your colors. Take into consideration any objects that you will be incorporating into the space.

Select paint chips that work well with your items and that appeal to you. Make sure to look at the paint chip under the light in your space. The lighting at the store may be very different then your lighting at home. Also make sure to tape it on the wall and look at it in the morning, afternoon and evening as a color will look different throughout the course of a day depending on the light source.

Choose one color for your walls  and keep the others for reference when choosing accessories, draperies, fabric, etc.

Assignment: Pick out the colors for your space and staple the color chips to an index card. Store in your purse for reference when shopping.

Worried about if you chose the right color? We’ll talk about that tomorrow! Amy xo

To start at the beginning of the series, click here!


31 Days to Decorate Confidently. Day 2: Explore and Create

I hear it all the time… “I just don’t know where to start”. Today is about getting started. Here’s how…

Designer’s know that a beautiful room starts with inspiration and inspiration is found by opening your eyes to the world around you. You’ll discover it through exploration of nature, the arts, a favorite possession, a pillow, magazines, etc.  The resources are endless, you just need to take the time to explore.

When Exploring, look for things that catch your eye. Don’t overthink it. If you find something beautiful or interesting, clip it, print it or take a photo of it. Stop and really look at your surroundings. Make a point to search for beauty and you’ll be rewarded. Inspiration can be found in the most unexpected places but you have to take the time to see it!

Assignment: Grab a cup of coffee or tea and explore. Look through magazines and catalogs; clipping photos that catch your eye. If you look online, print favorite finds and bookmark the link in a folder. Store your inspiration items in your binder or folder for tomorrows assignment!

Amy xo

P.S. If you missed Day 1 click here

I Spy…Aesthetics: It’s Often About the Little Things

I am in the middle of about 20 projects this weekend. I made a list of unfinished projects I want to complete by Sunday and so far I’ve crossed off four – laundry, a trip to Lowe’s, drop-off to GoodWill and grocery shopping. I figured I’d sit and blog for a few minutes because my back is aching from moving a dresser the other day, so dumb.  I took 2 Advil gel caps (the best, don’t you think?) and thought I’d say hello as I wait for it to kick in. Do you want to play a quick game of Interior Decorating  I Spy?

It’s a fun thing we play at Decorate Fabulously Workshops and it’s one of my favorite design-related things to do. I first “played” it back in college at The Fashion Institute of Technology in an aesthetics class. I don’t know why, but it stuck with me and it’s something I probably do sub-consciously almost every day: I examine things and figure out why I do or do not like them. In class, my professor would show us slides of buildings, rooms, statues, lamps, furniture, etc. and we would discuss our thoughts. Did we love it? Hate it? Either way, the object of the  exercise was to evaluate why we felt the way we did. Usually, if we didn’t like it, it was because something was aesthetically wrong. Just as important as identifying what we felt was good or bad, if we didn’t like it, we discussed how we could fix it. I think it was one of the most valuable lessons I learned.

Aesthetics (spelled æsthetics or esthetics) is a branch of philosophy dealing with the nature of beauty, art, and taste, with the creation and appreciation of beauty.[1] It is more scientifically defined as the study of sensory or sensori-emotional values, sometimes called judgments of sentiment and taste.[2] More broadly, scholars in the field define aesthetics as “critical reflection on art, culture and nature.” ~ Wikipedia

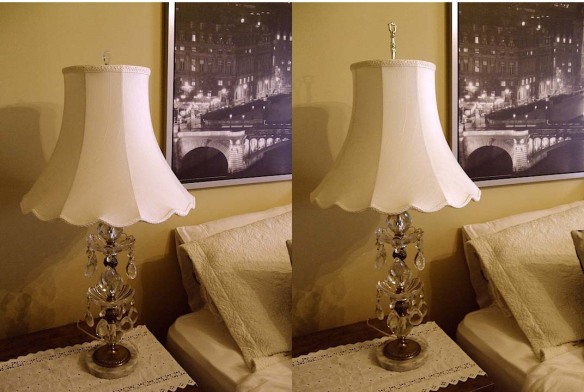
So let’s play a quick game. Before we start, I should point out that you don’t have to agree with me… it’s okay to have a different opinion in the world of decorating – that’s what makes it so wonderful! I’m going to show you two photo’s. Take a look at both and then tell me if you think one feels more “right”.  To me, there is a world of difference between the two.  The lamp was a gift, but something was really bugging me about it.  The other day I took a second to really look at that lamp and it hit me as to exactly why It was bugging me. Something was wrong. Once I identified it, all it took was a quick run to Lowe’s for a $3.98 purchase and now I adore this lamp. Do you know what it was? Take a look…

Can you spy the difference?

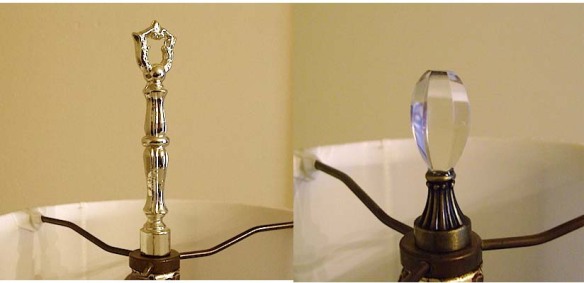
Here’s a close up…

I know it’s hard to tell in photos, but the finial on the left was a bit too tall and plastic with a bright shiny finish. It stuck out like a sore thumb. A finial should complement your lamp, not distract. The new one on the right (which was less than four dollars) is pretty, yet unassuming and the finish is the same as the rest of the lamp.  The crystal top compliments the original design. In person, it’s such a huge difference!

This guest bedroom is a neverending ongoing project. I’ll share it when I get finished 🙂

Have a great weekend… hopefully you’ll get to relax like our resident neighborhood night stalker who slept in my laundry basket all day. Meet Beanie…

He loves me. In the last three days he’s brought me a dead bat (which I almost picked up thinking it was a leaf), a dead mole which he smuggled into my dining room and a live baby bird which I rescued before he brought it into the house and sent it on it’s way. Lovely.  xo Amy

Free Advice Friday!

Have a decorating question? Ask away!

Yesterday I started Three Tip Thursday, so today I thought…Hey! Why not a Free Advice Friday? I love answering all of your decorating questions so I though this would be a great way to have some fun and answer some pending questions! Addressing decorating questions is actually one of my favorite things to do! Here are some answers to some of your questions…

Valerie asked…

Q: I want to have an arrangement of Greek tiles and plates over the fireplace mantel. Is it okay to have the arrangement be a little wider than the mantel?

A: My initial thought was no, but as always, you have to sit back and think outside the box. The problem is not going wider than the mantel, it’s creating an arrangement that is “heavier” than the mantel. By extending the arrangement outside the width, you automatically are creating a “feeling” that it is heavier than the mantel which then takes the focus off of the area as a whole. BUT, as always, there are not rules to decorating – just rules of thumb. What I would suggest is if you want to go outside the area above the mantel, make sure you “extend” the width of the mantel with something to the left and right that balances it out such as furniture, large vases with arrangements, low bookcases that look built-in, etc… The one thing I would avoid (unless it’s built-in looking bookcases) is putting anything too “hard” next to the already “hard” fireplace. I always prefer alternating hard and soft. When I say soft I mean upholstered furniture, plants, etc.

Shirley asked…

Q: In my living room, I have a large window that is in a recessed area that is 88″ wide x74″ tall. It’s sort of like a bay window, but not curved. I would like to hang drapes on the outside, from floor to ceiling, but the problem is that across the top of the opening, it’s just the ceiling – there is nothing across the opening at the top, if that makes sense. The ceiling goes straight through to the recessed area. So, even if I hang a rod as close as I can to the ceiling, there will be a gap at the ceiling that goes through to the opening – won’t that look weird? Any suggestions?

A: This makes perfect sense Shirley. I actually have the same situation in a guest bedroom that I am working on in my home. You really have two solutions. The first is to locate the rod on the walls to the left and right of the window. The key is to hang the rod as high as you can and to use a drape that will have some material above the rod. Hang it so the top of the drape will almost touch the ceiling. The only issue you have is you really can’t use a support in the middle with a traditional rod, so the rod needs to be extra long so the extender in the middle doesn’t sag. Also, the drapes cannot be too heavy or they will cause it to sag as well. The second option and probably the best one, is to get a ceiling mounted rod – JC Penney and Ikea both sell them. This will allow you to put a support in the middle and will avoid any potential sagging problems.
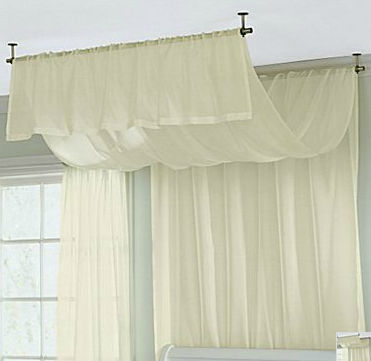
Example of ceiling mount rod

Carol asked…

Q: My great room has 1 love seat (solid fabric) and 2 occasional chairs(solid fabric). I would like more seating. Do I purchase another loveseat or 2 more chairs and solid or print?

A: This is probably better answered if I could see your floor plan, but generally speaking, here are my thoughts… When planning your seating, there are three considerations. 1) traffic flow, 2)) conversation areas and 3 beauty. Your first consideration is make sure that you know where your main path of traffic will be and to not interfere with that. The second is that you never want to put a single huge seating area around the perimeter of your room. Ideally, you want to create a main seating area with one or perhaps two smaller conversation areas with the same room. The first is perfect for your immediate family or a small gathering.The second and third areas are great for reading, writing in a journal, playing games or  intimate conversations.

I like two loveseat on either side of a fireplace with two chairs that are facing the mantel. I also like a love seat with two chairs across from it. I would avoid a love seat with four chairs in the same conversation area unless you have a really large room and can have additional conversation areas as well – it’s really too many chairs in one place I think, but they could go in a smaller arrangement. Maybe a loveseat and three chairs would work better. I worry about four chairs overpowering the loveseat. Additionally, think of creative ways of adding seating such as ottomans tucked under a side table or in front a hearth or even hung on the wall as I did in my house.

Thirdly, this is where the beauty comes in…as far as solid or print, I’d say add some punch with either a print – floral, plaid or stripe or introduce some nice textures. If you do add chairs with a pattern, make sure to balance it out on your solid upholstery with complimentary pillows or throws!

Good Luck everyone and let me know how your rooms turn out! Amy xo

The Two Week Re-Do
What do you think I can get done around my house in two weeks, working only nights and weekends? I only have 3 weekend days and 9 week nights as I am going to Columbus next Saturday for a meeting/fish fry and will be driving to Columbus to up a house guest at the airport on the 24th. Yikes!

As you may know, I have declared that I will have my house organized top to bottom by the end of the year. I also have some serious decorating to do along the way as I have put my house on hold for way to long to start a business.  As I set these goals in January, I thought I had a year to get a lot of this done, but a very good friend of mine who I went to Butterfly World with a month or so ago, has decided to meet me in Columbus for the Spring game on the 24th and come visit that night.  To say I am in panic mode is an understatement, although I have to say I am very excited about her visit! It’s not that she won’t love me if it’s not done, it’s just that she’s never been to my house and I want it at least semi-done. This is going to make me get some serious stuff done or at the very least started. I figured I would just go ahead and share it with you along the way…the good, the bad and the ugly.

Some things need to get done so that I have room for other things, so if they seem like silly things, there is a reason behind it. Here’s some of my to do list:

  • Find a place to store my daughters stuff. She moved back in for a bit and has lot to put away. I need to find a place for it.
  • Work a bit on the garage and pantry so I have room for things above.
  • Figure out a color scheme and inspiration for the two bedrooms. Will not have time to paint, but need to have a plan. 
  • Select carpet for two bedrooms, stairs, a hallway and study and schedule a measure.
  • Tear up the old and seal the plywood floor. A beloved dog of ours died and had a bit of a potty problem in his last days. Quite sad and very yucky.
  • Get the carpet installed by the 22nd.
  • Schedule a painter for April – need to get carpet laid first. More on that later.
  • Clean out the two bedrooms and study.
  • Make sure the Bathroom is ready for a guest.
  • Clean…that will happen along the way.
  • Find a table to go with my new chairs for my new cocktail area.

I can tell you that without the paint, it won’t be finished in two weeks, but the new carpet will make a huge difference. Stay tuned, I’ll be posting updates, photo’s and thoughts for the next two weeks. It’s getting a little crazy around here, haha! xoxox Amy

The Case for a Flame Free Candle

Assorted sizes and styles


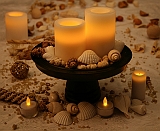
Purchasing a flameless candle was not on my list of things to buy until I recently saw them in person.  I realized how nice it would be to have few of these in my home. These candles are safe and create an amazing ambiance as well.  

Reasons to want them… 

 1. Fire Safety. It’s a no-brainer: If you fall asleep and forget to blow them out…the house won’t burn down.  

 2. Safety for children. If you have children, and need candles to relax, look for flameless candles that have a gentle flicker, use actual wax and come in a variety of scents.  

 3. Warm welcome home on a dark evening. I don’t know about you, but I hate walking into a dark home. Flameless Candles give you the option of a timer with up to 350 hours of battery time. Wouldn’t it be nice to come home to a candle-lit home every evening?  

 4. Protect your house. This goes hand in hand with number three. Not only will you walk into a cozy home, anyone outside looking in will see candles lit and think you’re home. Flameless candles are a simple and inexpensive safety feature.    

Miss the flame, but love the timer and the flicker


 Don’t get me wrong…I’m not giving up the real thing, but check out the flameless candles at Candle Expressions and Amazon. After a while, you forget they’re not real. xoxox    


An Organized Life. The Goals

So it’s been a month since I embarked on this  journey and although at the moment, I don’t really have a set plan, I do have some goals and rules that I am following. I’ve decided that I’ll choose projects as I go and see how it evolves. The truth is I’m not just cleaning our closets. I am cleaning out my life. My hope is that by the end of the year I will have accomplished or be close to accomplishing each goal I list below. Don’t worry, this year I’m still be talking about decorating, in fact I’ll take you along as I tackle some projects in my home, but I do hope you’ll join me as I dish about re-designing my life and surroundings. Below I’ve listed my goals and tomorrow I’ll share my rules. But before I do that, I guess I should come clean…

THE CONFESSION: I think every bad habit needs to be owned before it can be tossed, so here goes…I am not attached to junk, I just don’t make time to get rid of it. I know that everything should be put in it’s place, but I don’t make time to create that place or put it back. They say that a cluttered desk is a sign of creativity – I must be really creative…haha! Does that make me more creative by having a cluttered purse and a cluttered car? I don’t think so. The truth is I think better when I start with a clean desk and a clean space. I am less stressed when my kitchen counters are clear and I eat better when I know what I am going to eat in advance. I actually have an extremely organization mind and have been granted two patents for organizational products (shameless product plug). This year, I am going to put into action the things that I know. I hope you’ll join me!

THE GOALS:

1. Organize my Surroundings  and KEEP them that way. This includes my purse, car, garage, office, etc. I think that will be the easy part. I imagine that organizing is much like losing weight and eating healthy; it has to become a way of life.

2. Organize my Projects, Bills and Paperwork. I once took a job for a year or two that was so mundane I could clear off my desk at the end of the day and not worry about a thing until I arrived the next day. It was nice for a bit, but it eventually drove me crazy. I need the exitement of creating new things, tackling new projects and taking risks, but there should be a happy medium. I will pay attention to the things I don’t like to do, so I can be successful at what I love to do.

3. Organize my Schedule to Design a Healthy Me. (3 part)

a.) I will take Iron. I am anemic. I’ve needed to take iron for years…I’m thinking I really ought to make time to take that stupid little white pill once a day so I have the energy to get this all done. My teeth will thank me. If you are an ice chewer, get tested for anemia – your teeth will thank you.

b.) I will exercise. I hate it. I just do. I hate to make the time, I hate to sweat, I just don’t like it. My doctor says I have to do it, I guess maybe she might be right. I am going to start with walking in my house (because it’s cold outside) with Leslie Sansone ( on DVD) at least 3 times a week. I will also play wii fit- I do love my wii. My kids bought it for us for Christmas and I need to maintain my first place status in multiple events, but I will branch out to more athletic events instead of just the balancing ones, which are my favorite 🙂

c.) I will eat healthy. I need to prepare food on Sundays…chop, cook, etc…anything that makes it easier during the week. I need to know what I am going to eat tomorrow before I go to bed, so I don’t make bad choices…aka: stuff a lot of pointless things in my mouth that make me fat. I am going to cut out sugar and white flour and lean towards clean eating. It will be a work in progress, but at the end of the day…or hopefully the year…I will be at a healthy weight. I’m not going to lie…I want to fit into my Calvin Kleins. I bought them in the designer department at Macy’s on 34th street in the 80’s. I looked hot in them…at least I thought I did.  They’ve  been to Studio 54, Tavern on the Green, Serendipity and Sunday afternoon breakfast in the village. I just want to be in them one more time.  I’m not going for hot, just in them. Well maybe a little hot…but I digress….till tomorrow…xoxox

All About Ceiling Medallions

Close up Medallion

Look up at the ceiling.   

Is there anything special up there? The surface that everyone seems to forget when decorating is the ceiling and my bet is you’re looking at one that’s been forgotten as well. Let’s face it, we give our full attention to selecting the flooring, choosing treatments for the walls and windows, but more often than not, we forget about the ceiling. Oh yes, we choose lovely lighting and hopefully we’ve chosen it for both beauty and function – but what about beyond the lighting?  

There’s endless decor ideas for ceilings such as faux painting, stenciled designs, tin tiles and more; typically, we just don’t think to use them. One of my favorites accents to place a ceiling medallion above a chandelier. Medallions are affordable,  available in all shapes and sizes and can be hung as-is or even better; painted.  

I have a medallion sitting in the corner of my dining room that I’ll post about when I get around to finishing it, but in the meantime I photographed a project that my friend painted one day when I was visiting. Here’s some helpful tips for selecting, painting and hanging a ceiling medallion.  

Selecting a Medallion. Medallions come in all shapes and sizes. Your local home depot or Lowe’s, will  offer a choice of assorted white medallions which be mounted as is or hand painted to match your trim or decor. You can also find medallions in a bronzed finish to match your chandelier. They can range from $18.00 to $200.00 and up. Some are very lightweight and others are heavier. Once hung, you it’s pretty difficult to know if it was inexpensive or not. It’s about choosing the style and finish that is right for you.  

Classic Medallion

You can get a simple classic design like this..


ornate medallion

Or a traditional, ornate style such as this...


Bronze Medallion

Here's a medallion finished in bronze...


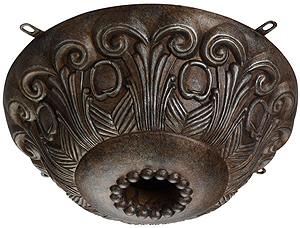
Dome Medallion

Another that's dome styled


Giclee Bronze Ceiling Medallion

Giclee bronze medallion


Wrought Iron Medallion

Wrought iron


Above are just a few of the many styles and finishes available. The photo’s are from LampsUSA and additionally, you can  find lots of online sources.  

Once you decide the style you prefer, size is your next concern. Now it’s all about proportion. If you have a larger chandelier, you want a medallion that is big enough to provide balance – too small, and it will look out-of-place. The reverse goes if you have a small chandelier.  You want to select a medallion that is proportional in size – anything too big will over power a smaller light fixture. I’ve been referring to chandeliers, but you can really use medallions with many styles of  lighting fixtures; even ceiling fans.  According to LampsUSA, which is where the medallions above are from, here are some thoughts on sizing:  

Sizing rules of thumb:  

  • A ceiling medallion should be two-thirds the diameter of the chandelier.
  • Larger rooms and higher ceilings can accommodate larger ceiling medallions.
  • For a typical dining room with an 8′ – 9′ ceiling, a medallion that is 18″ – 26″ in diameter will usually work well.
  • 20″ – 28″ ceiling medallions work well with 52″ ceiling fans.

Coming up: Follow along as my friend paints a medallion for her home to complement the chandelier below…  

Chandelier

This Chandelier is going to get a Painted Medallion...


Step Five: Adding a Wood Floor- a Kitchen on a Budget

door to porch      
After Photo: New Wood Floor


 The Kuster’s are just about finished with their kitchen remodel, which means I’ll do the full unveiling soon, but in the meantime, here’s a sneak preview of the new wood floor. They used prefinished planks they found at Sam’s that fit their budget and their needs. I’ll talk more about wood floors in my next post, because I’m going to see it in person tomorrow evening and want to take some close of photo’s to show you what I’m talking about – I like visuals 🙂

Below is the before picture – amazing what a difference a new coat of paint and a DIY wood floor can make! Stay tuned for the final pictures…

Before Photo: Old paint and Flooring

Finding Inspiration: Take a Closer Look

Beach and Palm Tree
Inspiration can be found anywhere

A decorating project is always easier if you start with inspiration. Inspiration can be a page from a design magazine, a treasured item in your home or something as simple as a sea shell found on a beach. The interesting thing about inspiration is it often may be right in front of you. Unfortunately, if you don’t take the time to really “see” your surroundings, you may be missing some really beautiful things. How often do we get caught up in day to day activities that we overlook the tiny details that life offers us and miss out on truly “seeing” the beautiful things that are often right before our eyes.

As I first walked the shores on the northern tip of Grand Cayman Island a few weeks ago, I thought to myself how easy it would be to design a space inspired by white sand and shimmering water in shades of blue and green…but then I was prompted to look a little closer… 

Along the shoreline
Along the shoreline

To be perfectly honest, after an initial glimpse of blue skies, white sands and sparkling water, I would have been totally content to sit with my toes in the water, a good book, and a glass of iced tea. If I hadn’t been prompted to take a closer look by a seasoned beach explorer, I would have sadly missed a collection of treasures deposited by the sea.

Hunting for treasures of the sea

A true treasure seeker I have learned, knows that in order to see beauty in it’s entirety, one must have a keen eye…a treasure seeker needs to really “see” everything around them including what’s often beneath their toes. 

Closer view
Closer view

Even from this view, it’s tough to really see what treasures can be found, but I discovered that if you look close enough, you may be lucky enough to find items such as these…

Treasures from the shore

Upon closer examination, I found tiny perfect shells, colorful sea glass, and amazing coral rock…

Washed up bottles and fisherman's netting
Washed up bottles and fisherman’s netting.

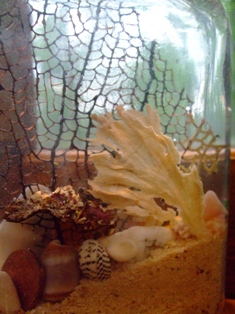
The treasure seeker suggested that I combine my beautiful finds with a few handfuls of sand, several washed up bottles and pieces of old blue netting to create beautiful keepsakes such as the sea bottles below. They’re 100% made of items from the beach… Treasured memories in a bottle.

Treasured memories in a bottle

And then I got to thinking…and looking even closer…

Close up of a bottle

Close up of a treasure bottle

Could a decorating project be inspired by a simple tiny shell that I almost didn’t see? There were two shells that I loved above all the others that I found.  One of those shells can be seen in the close up photo of a  treasure bottle above. One afternoon, as I explored the shoreline, something caught my eye…
Shell from a distance
From a distance
and I bent down for a closer look…
 
Really quite extraordinary

Would you have taken the time to see these two shells?

Could these tiny little shells that are smaller than the nail on my baby finger actually provide inspiration for a decorating project? I think so.. In fact, I imagine that the color and pattern found in those two little sea shells could inspire a room just like this…

Could this interior by NYC designer Evelyn Benatar been inspired by a tiny sea shell?

Could this interior by NYC designer Evelyn Benatar been inspired by a tiny sea shell?

I really don’t have any idea as to what the actual inspiration was for the beautiful room above, but  I do know that inspiration can be found anywhere and the key to finding it is to learn to truly “see” your surroundings. Whether you’re inside your home or on a far away beach; if you take the time to explore the little things (like a treasure seeker),  you might just discover that something as simple as a tiny sea shell can inspire a color pallette that dreams are made of.


Step Four: Valances and Wall Art – Kitchen on a Budget

 
Painted Wall and Cabinets

If you’ve been following the Redo of the Kuster’s Kitchen, I’m happy to report that the painting is done and it looks fabulous! As of the last update, they had painted the walls and beadboard, but still had the cabinets to complete. It’s amazing what a little paint can do!

Before Photo
Before Photo

 Lori found some apple pictures that she really liked. Remember the original apple photo that she loved? I think the new one’s below work much better – don’t you?

dscn0434
Wall and Beadboard Painted with New Artwork
Wall before Paint and Art
Before Photo

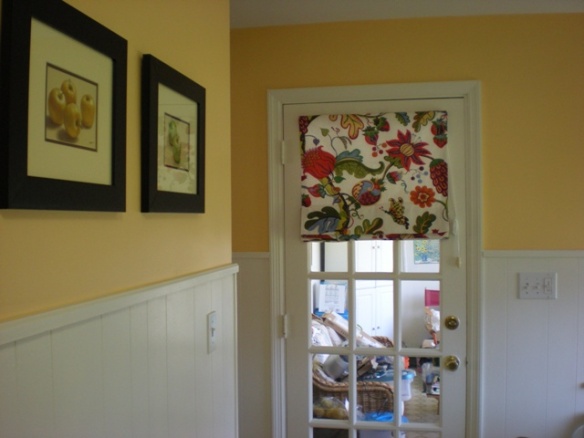
Additionally, they hung the window treatments on the window and door Doesn’t the valance on the door look great with the photo’s? Lori purchased an extra one so we can make a custom valance to go over the eating area. I’ll take lots of photo’s when we do that in the next few weeks!

new-pictures
Valance on Door

What’s up next? Besides hanging the chandelier and making the additional valances, the final project is to lay the wood floor. They found prefinished laminated flooring at Sam’s Club and hope to have it finished in the next few weeks! I can’t wait to see that! I know…I’m holding out and you haven’t seen all the areas, but I wanted to save the best for last! Once the wood floor is installed, we’ll do a full unveiling…Stay tuned!

Step Three: Painting the Kitchen-a Kitchen on a Budget

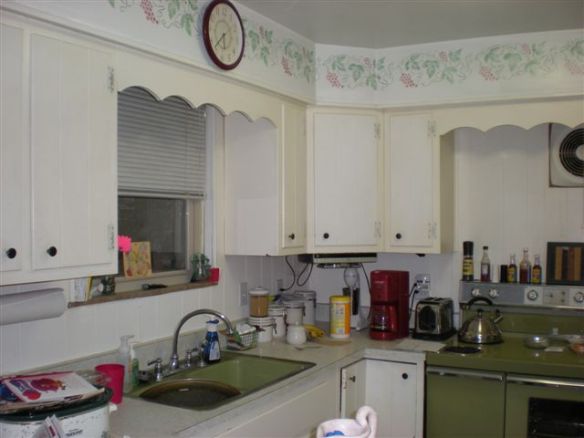
Before Photo: Kitchen with Border

Before Photo: Kitchen with Border

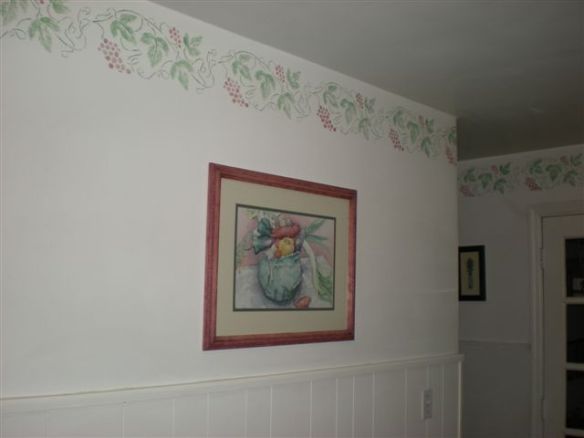
Last weekend, the Kuster’s started painting their kitchen in Step three of their kitchen redo on a budget. Phase one was about finding the inspiration for their project and phase two consisted of selecting the finishes that they would apply. This past Saturday, Bill primed the walls. Ten years ago, Lori and I had stenciled some grape vines on the wall with oil based crayons, and as cute as it was back then, she’s so over that look. The before photo above shows the existing stencil at the top of the walls that extends throughout the kitchen.
Priming the Walls before Painting

Prime the Walls before Painting

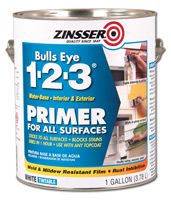
On Saturday, the first step was to apply a primer to ensure the oil based stencil can be easily painted over. Bill used the product below by Zinsser. It’s a water based primer that doesn’t require sanding, seals stains, sticks to all surfaces and is resistent to mold and mildew. Best of all, it dries in an hour. It may be an extra step you didn’t plan on, but it’s definately worth it in the long run. There’s some odor involved, so it’s best to open some window to ventilate.

Kitchen Walls with Primer

Kitchen Walls with Primer

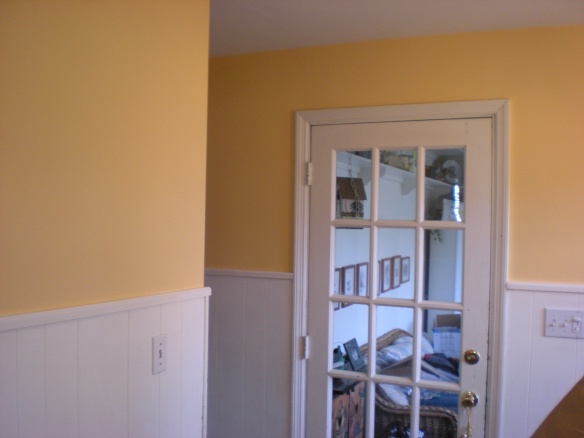
On Sunday, it was time to tape off the areas to be painted with Sherwin Williams Afterglow which goes on all the wall surfaces above the white bead board chair rail which still needs to be painted and the cabinets. Lori and Bill chose a satin finish so that it wouldn’t reflect the walls imperfections, yet could be easily cleaned as needed.

Sherwin Williams Afterglow

Sherwin Williams Afterglow

Here’s a before and after photo of another area of the kitchen…

side-door-in-kitchen

Before Photo of Side Door in Kitchen


Afterglow above Chair Rail

Afterglow above Chair Rail


Painted Wall with Roman Shade that was the Inspirational item for The Kitchen

Painted Wall with Roman Shade Laid Over the Door to see how it Matches

I’m thinking it’s going to be FABULOUS…what do you think? Great job Bill! Next step will be to paint the chair rail and cabinets. Stay tuned!

Step One: Finding Inspiration – A Kitchen on a budget

kuster-kitchen-color-board

My friend Lori called me a few weeks ago and wanted help picking colors for her kitchen. I knew I wasn’t going to be able to get together with her and her husband Bill for a few weeks, so I gave her some assignments before I met with them. I thought I’d blog about the process with you from beginning to end and also share my thought process so you can see how some of the decisions were made. Although I did get together with them this weekend to choose the paint colors, it really has been a project that they have done on their own. They key to a successful project is to really think it out before you run to the paint store.  When I talked to her a few weeks ago, she was biting at the bullet to get going, but by pulling back and really thinking it out, I think they’ll have a kitchen that they really love on a budget that they can afford. 

Here’s a couple of photo’s of their kitchen as it is now…

cabinets2Main kitchen above and side door next to eating area is below

side-door-in-kitchen1

INITIAL QUESTIONS

 What is your budget? Lori and Bill want to keep the project as inexpensive as possible. It’s one project of many that they have planned, and they don’t want to go to the expense of a full kitchen remodel.

What do you want to keep? Actually, the better question is what do you need to keep! Obviously, we’d all like to have everything new, but that’s not always realistic. Keeping their budget in mind, they have chosen to keep the existing cabinets, mini-blinds and appliances, but do want to replace the vinyl floor with a new wood floor and  the olive green sink with a white one. Fortunately, Bill is a willing to do all of the works (gotta love that!) which will save them alot of money!

Summary: Knowing the above, this is what they have to work with…

  • Worn, but charming painted cabinets that could use a little revitalization.
  • White refrigerator and dishwasher
  • Tall Painted bead board wainscoat which adds to the charm of the kitchen
  • Nickel finish table and 4 chairs with wicker seats. (Table has a glass top with blue inlay tile underneath, but we will not design around that, as we can ultimately cover the blue if need be.)
  • Olive green double oven that will eventually be replaced
  • Red coffee maker that was a gift from Bill’s parents

Do you have a particular style, color scheme or look in mind? They really didn’t have anything in mind or at least like most people they couldn’t verbalize it. They just new they wanted a new look. They wanted something fresh and inviting. A place they wanted to spend time in.  

HOMEWORK

I had Lori go through magazines and websites on her computer to find pictures of things that she loved. When looking on the web, some good places are sites of stores that you like, better homes and gardents (bgh.com)  or even blogs like this 🙂  Lori doesnt’ need to necessarily find photo’s of  kitchens, but rooms that she liked the look of. She also might find a piece of artwork, a color scheme, or a vignette that she likes. The point here was to  look and earmark anything that caught her eye and made her feel good. The only rule is don’t think too much. The end goal here is to find an inspiration picture or two.

Why do you need an inspiration picture or item? An Inspiration picture or item is a visual guide to help you start a project. It’s an invaluable tool, as it can keep you on track as you  become overwhelmed with  decisions you’ll need to make. It could be a treaured picture or item that you want to incorporate into the room or a photo of something that you love that you found in a catalog or online. Maybe it’s a photo of a room that catches your eye and you want to achieve that look and feel.

In Lori’s case, it was several things. Last week, she found first found a look in a pottery barn catalog that she loved…

inspiration1

And then she found a valance that pulled in the colors of her stove and her red coffee maker. 

window-roman-shade

Bill was a little iffy on the valance, but agreed to hold judgement till they saw the real thing. I took the inspiration photo’s and made the color board that is at the top of the post and suggested that the next step was to order the valance and see it it was right. She did get swatches from the local pottery barn, but with the size of the print, it was too hard to tell if it would work. 

Tomorrow, I’ll let you know if it matched and the next steps they’ll take!  


Quick Tricks for Halloween Treats!

If you’re like us and have been too busy to get into the spirit of things, here’s a few suggestions to get back your Halloween Mojo!

Grab a bag of Candy Corn, Mix with a cup of Dry Roasted Peanuts and put in a favorite crystal dish on top of a coffee table for visiting goblins. Warning: Can be addictive.

Dig up a mask (we know you have one somewhere!) and greet the little devils and princesses at your front door for some instant fun! Guaranteed to make someone smile.


Light some candles around the house for some “spooky” shadows and set the mood for a relaxing evening at home!


Go to http://www.ez-tracks.com/Halloween.html to download some free Halloween Sounds and Music – sure to get you in the spirit! Note: This is not an endorsement of this site – we’ve never actually downloaded from here!


Mix  up a Pumpkin Martini just for you – you deserve it! Jayne and I are having one right now! Okay, not really, but we would like to having be one! Happy Halloween! Here’s the Recipe from www.drinkoftheday.com

 Have a fun and safe weekend!


Beauty is in the Eye of the Beholder

“Decorators should never insist on throwing out everything the client has. Even when they are far from perfect they add personality”  

                                                                                     ~Billy Baldwin

This quote brings to mind, my very first residential client many years ago named Don. He was a bachelor in his 60’s and had spent many years taking care of his aging mother. After she passed away, he decided to move into a one bedroom condominium and wanted a contemporary look that was fresh and reflected his personality. Everything was to be new and with $25,000.00 cash in hand to shop, it was a young designers dream!

Of course I had a vision for the space and he trusted me with any decisions and purchases I made for him. As a young designer, I prided myself on my eye for what worked and what didn’t and was very proud of the end result. On move in day, he had tears in eye as he walked in and saw his new home. it was even better than he had dreamed and I was thrilled that he was so happy – after all, that’s what it’s all about!

Then he said “Amy, I have one more thing for you to do – find a place for this. He handed me a very bad silk version of a red rose. Three red roses, in fact, that may have even been plastic. The look on my face was one of a deer in headlights. Are you kidding me? The entire house was done in jewel tones and the primary color of a red rose was definately not in the color scheme. “These are  moms”, he said “and she treasured them- they need to be someplace special”.

It was a defining moment in my young career, because I realized then, that it’s not about creating a show place, but creating a home. For Don, the roses made his house a home. I could have hidden them in bedroom, or tucked them into a corner, but I put them on a prominent shelf in the living room so that he would see them every day. In the end, it’s not about what is beautiful to the designer, but what is beautiful to you. I am grateful for that lesson early on.

Update: Jayne wants to add that she made all the fabulous floral arrangements (she had a custom floral design business at the time) and that it was after she brought in and placed all her BEAUTIFUL arrangements, that he brought out the plastic or silk red roses. You should have seen the look on her face – haha!

Ask a Decorating Question: Working around a Forest Green Carpet in a Bedroom

Photo courtesty of www.bhg.com

Patti wrote us over the weekend with a Decorating Question regarding her bedroom. She has forest green carpet, oak furniture, white walls and burgundy comforter and wants an updated look without having to replace the carpet.

I actually had a similar situation with dark teal carpet that came with the house we bought – I really didn’t like it, but it wasn’t in the short term budget to replace. In my case, I chose to paint the walls a warm beige color and used neutral bedding with accents of tiffany blue and deep brown. It turned out really nice and Patti, I’m thinking this approach with different accent color may work for you as well.

I searched through Better Homes and Garden’s idea area and found the photo pictured above of a bedroom that I think could be a great inspiration photo for you to use as starting point and added some suggested colors to the left (and a green one below to represent your carpet). It’s done in neutrals – with shades of white, creme and beige; accented with an orange-red in the form of pillows, accessories and artwork. I would start your project by choosing a warm neutral beige for your walls, making sure that it doesn’t fight with the finish of your oak furniture. The one in the photo above is actually a little cool.

Select multiple paint chips at your favorite paint store and tape them to your furniture. Stand back and squint. You’ll see some that will stand out like a sore thumb – get rid of those. What you are looking for is one that makes your wood appear warmer and even more beautiful against it. Once you choose a wall color, select several shades (both lighter and darker) in that family to use as reference when shopping for other neutral items such as bedding and pillows. The key to developing a success neutral color scheme is that the shades all work together. Using the “squint test” is a great way to see if they work together – if they blend, they work well together. If one sticks out – find another!

A simple way to shop for items, once you pick a paint color and other neutral shades is to staple or tape the paint chips you select to an index card and keep it in your purse. I’d also suggest matching a chip to your carpet and adding that to the index card as well so you have that  to reference when shopping as well.

Once you get your neutrals in place – painted walls and bedding, it’s time to add some accessories which is what will make your room special. I’d go with an orange red and dark browns (almost black). Don’t go too red, or it will look like christmas 🙂 You might also want to add a large area rug in the bedroom to “absorb” some of the green and a smaller one in your bathroom to pull the colors into there.

One thing to note about a neutral color scheme is that it’s details and textures that will make it really special such as in the photo above.

Here are some things I found that could work on a budget and look fabulous!

Nate Berkus has beautiful neutrals and textures (shown above) found at Linens and Things that just happen to be on sale!

And check out this Tulipere from Ballards. Fill it with fresh tulips or find some fabulous silk one’s at a craft store such as Hobby Lobby or Michael’s.

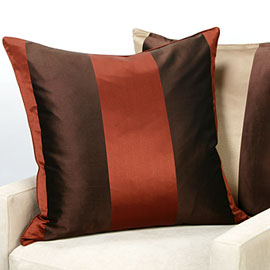
The Pillows above and art below are from zgallerie. Pillows may be a little pricey, but I like the bold stripe.

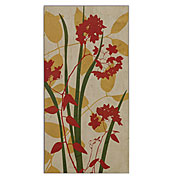
This pair of canvas prints may be the perfect touch for the walls – they are simple yet will really pull the room together.

These assorted items from Crate and Barrel Accessories are perfect for a little punch to a neutral room.

A rug like this from Ballards placed in the bathroom can pull all the colors together and provide some softness to the room. You might want to even choose to be really bold and paint the walls the organge-red color that you used to accent the attached bedroom!

Good Luck Patti! Send us Pictures when you’re done!

Amy & Jayne

Introducing Dish on Design Workshops and Decorate Fabulously!


Whew!!!! If your’re wondering why I’ve been so quiet, it’s because we’ve been working really hard – like night and day crazy hard, to nationally launch our newest brand – Dish on Design Workshops. We are sooooo happy to introduce the first Dish on Design Workshop – Decorate Fabulously! It’s been 3 years in the making, but we think it has definately been worth the wait!

Jayne are I created Decorate Fabulously! to bring together our two favorite groups of customers – homeowners and design professionals.  If you have a passion for decorating or even a fear of decorating, this workshop was written just for you! In the spirit of a  “Girls Day Out” you can spend a day with a design professional in your area who will walk you through the world of decorating with lots of designer tips, inspiration and hands on projects! You’ll explore everything from inspiration to completing a project; including how to draw a floor plan and furniture arranging. As a bonus, you’ll even take home a Decorating Assistant.

So far we have instructors (Design Professionals) in Idaho, Washington, Atlanta, Oregon, Florida and New Hampshire and we are adding more every week. Check out our website weekly for more information and updates at www.dishondesign.com We think you are going to LOVE it!

Free Giveaway – Win a Decorating Assistant!

www.completeorganizingsolutions.com     da5.jpg
Enter to win at completeorganizingsolutions

 Tanna over at Complete Organizing Solutions just e-mailed to say that she reviewed the Decorating Assistant and she’s giving one away next week! Simply read her review and tell her what you think by March 20th; you’ll automatically be entered to win. She’ll anounce the winner on March 21st. The Decorating Assistant is a stylish planner and organizer for anyone decorating, remodeling, or building a home.

After you register to win, take some time to explore her site. I found some great ideas and really liked her thoughts and suggestions for having a kitchen/laundry room combination! Good Luck!

How to Draw a Floor Plan (and why it’s so important!)

sample-floorplan.jpg

To some people, the thought of drawing a floor plan may sound overwhelming, but in reality, it’s actually pretty simple with the step by step instructions below. Once you try it, you’ll wonder why you waited this long and you’ll find that your project ultimately will be much less stressful when you have a floor plan to reference.

There’s a good reason why professional designers and decorators start a project by drawing up a floor plan, and it’s because a floor plan truly is the foundation for a room that is functional as well as beautiful. Additionally, a floor plan will help you to determine not only what furniture will fit into the space, but what is the best furniture arrangement for that room. Whether you’re buying new furniture or using exisiting, it’s much easier (and fun!) to draw your floor plan and do multiple furniture arrangements on paper as opposed to breaking your back moving heavy items and then discovering out it doesn’t work.

Floor plans are important in the fact that they allow you (and prompt you) to really think out the space; planning for seating, lighting, electrical outlets, cable boxes, traffic flow, and more. The biggest problem that most people have is actually understanding a floor plan and feeling comfortable with it. The best way to understand how a floor plan applies to you is to imagine yourself in that room. Pretend to walk through the door. Look around and start visualizing each wall. Is there a great fire place that you want to hang a beautiful piece of artwork above? Consider making that the main conversation area around the fireplance. Perhaps on another wall there are two large windows with a gorgeous view – consider that area for a smaller conversation area or gametable for a secondary seating option that capitalizes on the view. Pretend that you are in one of the seating areas. Is there a lamp for reading? An outlet to plug in that lamp? A table to set down a drink? Is there enough room (3 feet) to walk between the furniture? 

To sum it up, drawing a floor plan can be the difference between a so-so room and a room that everyone wants to spend time in. Imagine yourself living, playing, and relaxing in that room. Have fun, be creative, relax and get started. I think you’ll discover that with a floor plan in hand, decorating  just got a little easier!

Click on the link below to our website and scroll down to the bottom right of the page, you’ll find printable step by step instructions to drawing your own floor plan. Additionally, you’ll even find a convenient download to print off free grid paper to help get you started. http://www.assistantproductgroup.com/APG-2/index-3.html Good luck!